This section will help you customize the header of the report.
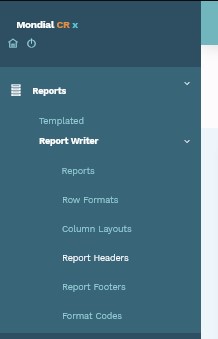
On the Mondial Home screen, select Reports. Select Report Writer on the drop-down. Select Report Headers on the subsequent drop-down.
A list of the existing Report Headers will be displayed and on the top right section of the screen, an option to add a new header will be presented.

Once Add Report Header is selected, the following screen will be displayed
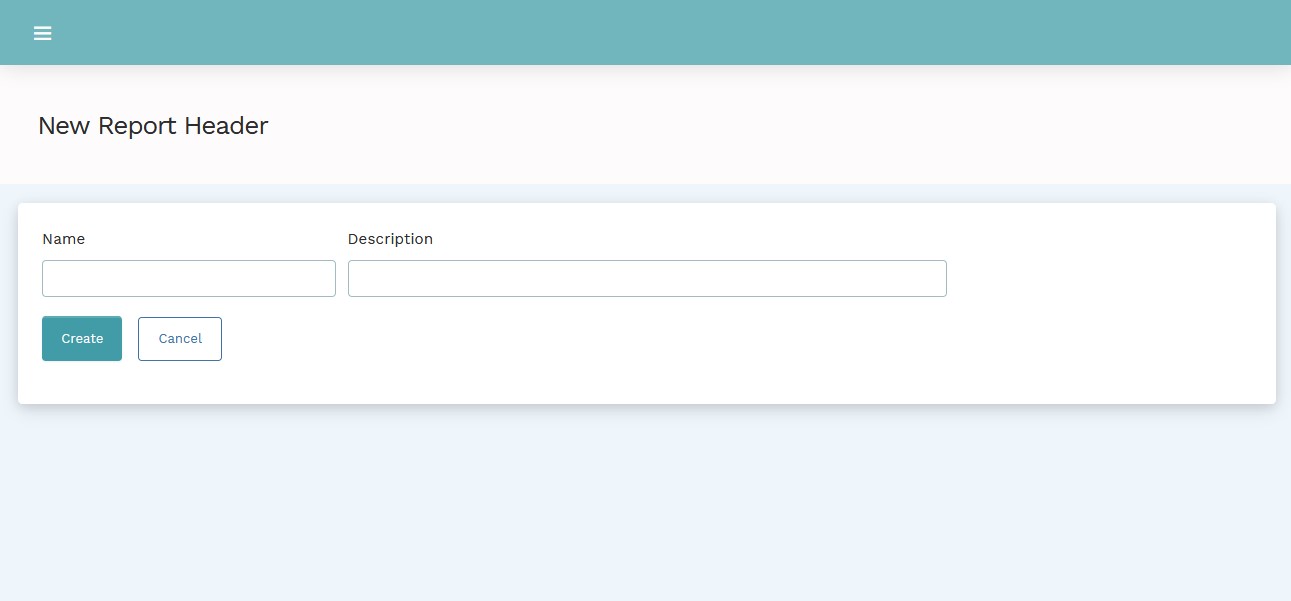
Add a name for the header and a description to explain the report in more detail. Click on Create to create a new header and the following screen will be presented

Once the report is created successfully, a middle pane with several drop downs and data entry columns will appear.
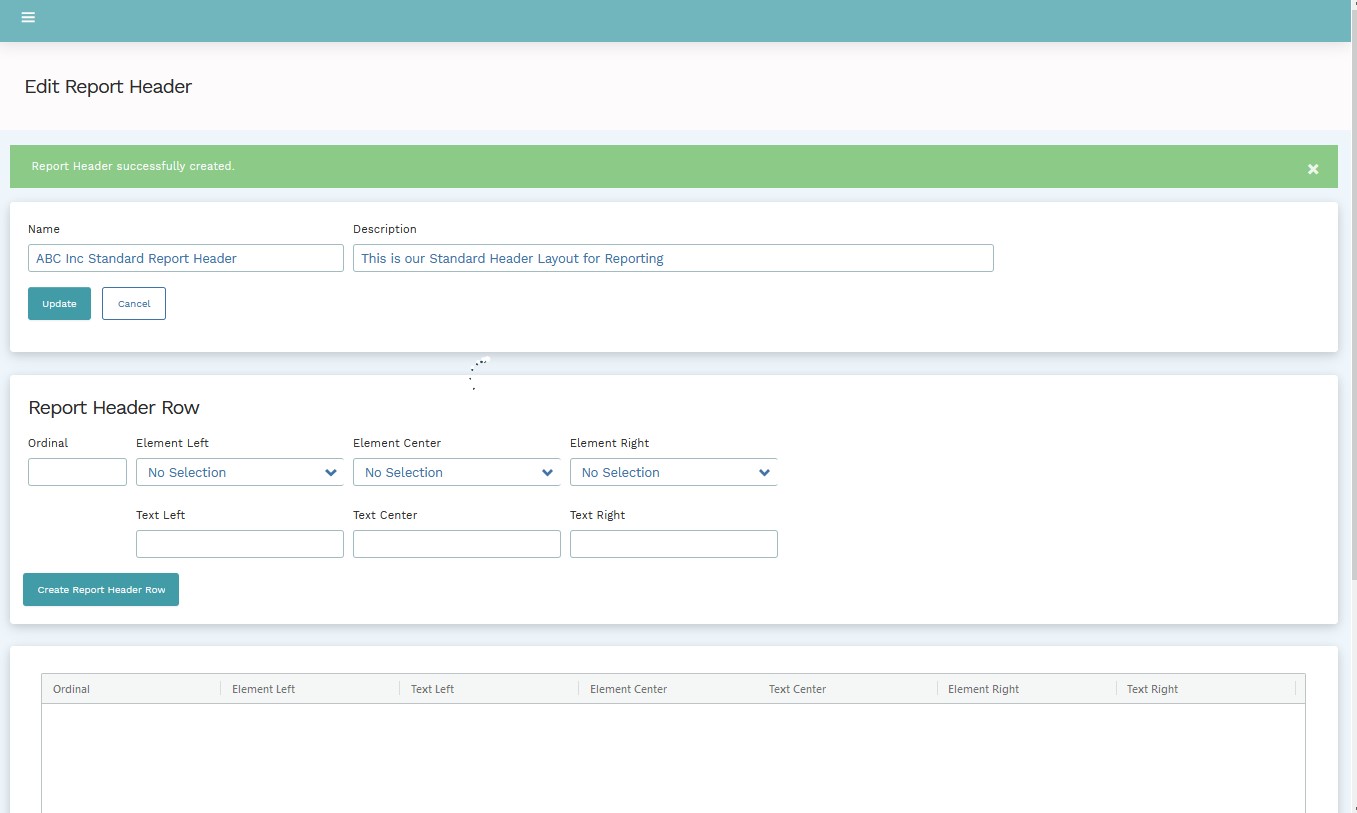
Guidelines for Entry
| Field |
Nature |
Description |
| Ordinal | Data Entry field |
A numbering sequence to ensure that data required is presented in the order desired. A sequence of the multiples of ten such as 10, 20, 30, etc is suggested. This allows for the entry of additional rows in the header later as required. |
| Element left, center, and right | Dropdown selections |
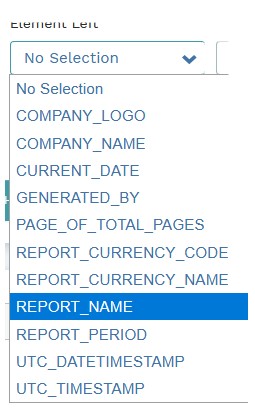
Select the preferable option from the list presented as shown:
The company name or logo will be retrieved from the entries created during the Enterprise Set-Up stage of the Mondial CRx application. |
| Text Left, Center, or Right | Data Entry Field | Add a piece of user-defined text as required. |
| Format code Left, Center or Right | Dropdown Selections | You can select the format code that will be applied to the text on the left, center, and right of the report. Read more on Format codes here. |
Note: Elements and text cannot be mixed using the same ordinal. They MUST be separated using a new ordinal. So, for example, the text could be placed on ordinal row 10 and elements on ordinal row 20.
When row the information has been added, select the Create Report Header Row button. The newly created row will appear in the bottom section of the Report Header Screen as below
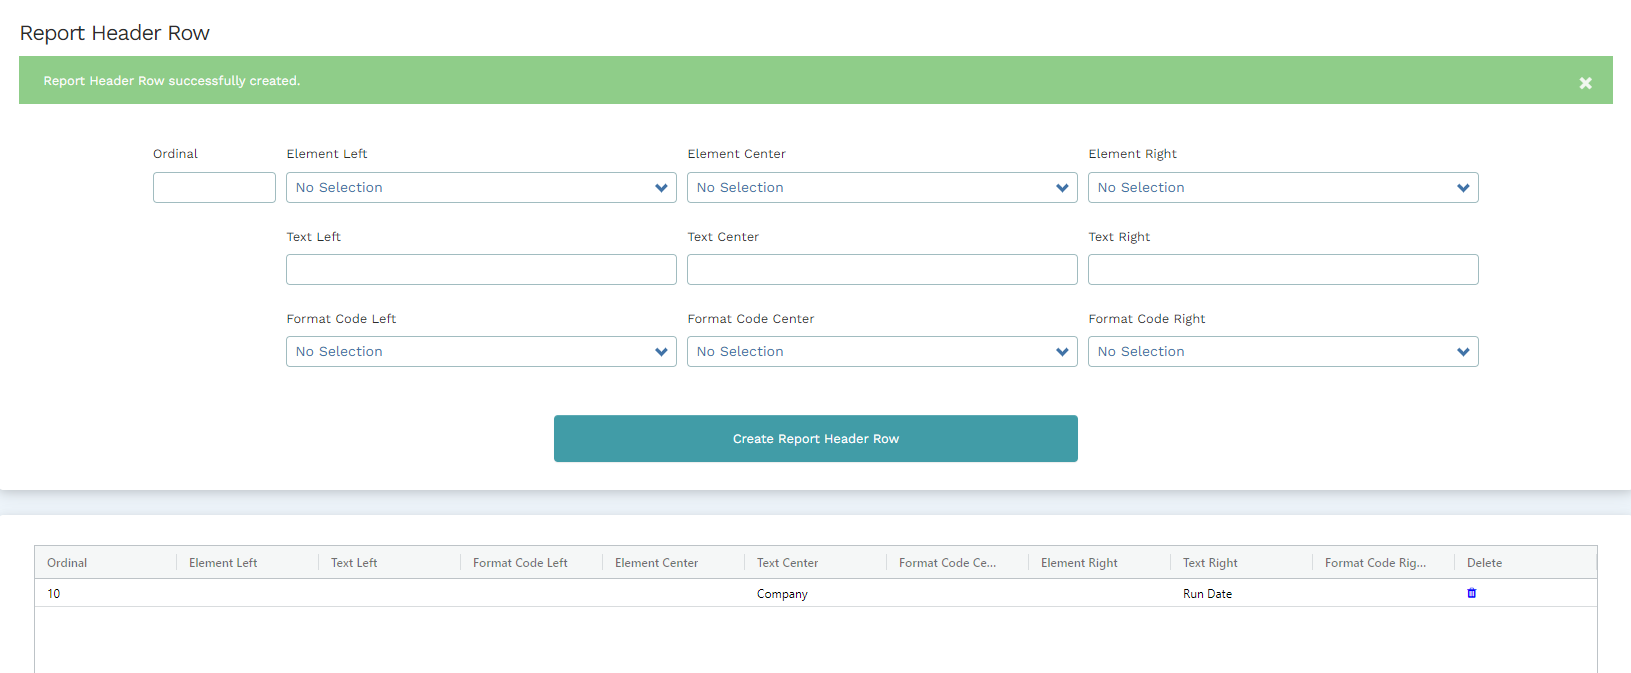
Note the option on the right to delete the row if necessary.
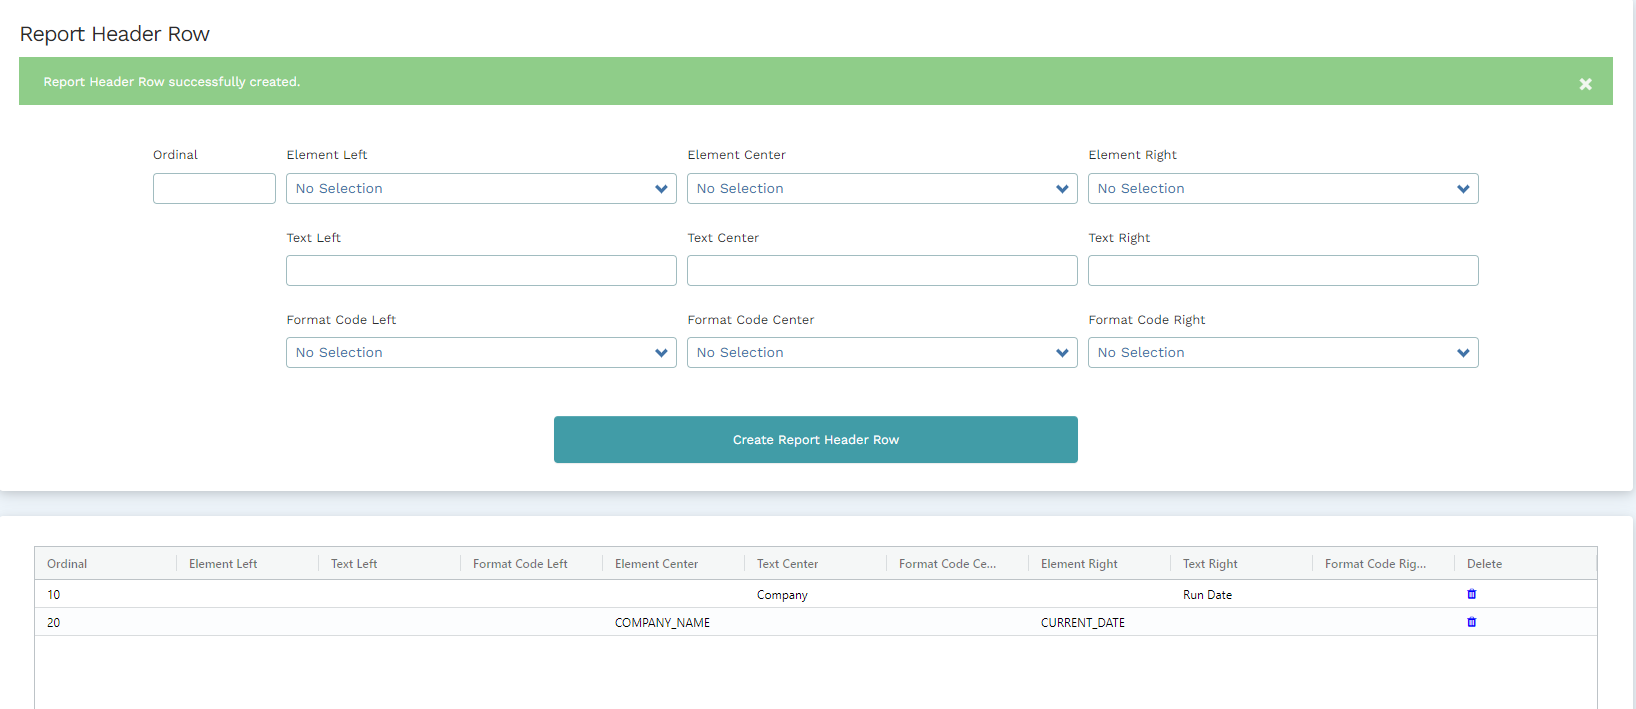
You can add a second row with ordinal 20 selecting Elements (Company_Name and Current_Date) for the Center and Right entry field.
When element information for the header has been provided, select the Create Report Header Row button.
The newly created row will appear in the bottom section of the Report Header Screen below where a text ordinal is created followed by an element.
When the new Header Row is created, you can return to the Report Headers home screen and the new definition will have been added to the list and will be available for later use.
Note: The newly created Report Header can be edited further or deleted.
To do this, use the Actions on the right of the description.
Comments
0 comments
Please sign in to leave a comment.